Hi WOOFers,
My name is Mark I am one of the officers of WOOF. One of WOOF's purposes is to encourage and enable our members to build 3D printers. In keeping with that goal I'd like to introduce my original design: The Ulticrater.
I hope to inspire other WOOF members to also build
their own 3D printer, whether it's an existing or original design. Either way it's a very rewarding accomplishment.
I have been working since the beginning of last summer to develop this printer. What started as an attempt to utilize a bunch of leftover parts from other projects to build a cheap printer eventually evolved into something that I'm proud to have my name attached to. My perpetual cycle of design, build, test, repeat has made this a slow road, but a rewarding one.
The most outstanding feature of the machine is the milk crate frame. From the beginning I recognized the benefit of having a sturdy frame with minimal assembly required. To me the milk crate was the perfect choice. Other than cutting out some ribbing from the sides and drilling a few mounting holes every milk crate is already an Ulticrater frame. The milk crate makes for a compact printer that can be easily transported. I also love how much the milk crate gives it a hipster-hacker look. The only real drawback is an inherently limited build volume. I did what I could to maximize it and it ended up being about 170x155x175mm (not bad considering that most Repraps are no more than 200x200x150mm).
I could go on and on about the printer but I think pictures are much better than words in this case.
I have a few videos of printing that were too big for Blogger to post. Follow the links to my Youtube channel where I've posted them:
Printing a comparison part
http://youtu.be/elPq56tUgEY
Fast printing test
http://youtu.be/5qBtARTGfjc
The features of the Ulticrater were either prescribed from the beginning or evolved from the design process. Since it was my design and I wasn't under a tight delivery schedule I was able to incorporate lots of awesome features.
 |
| The Ulticrater. Pardon my photography skills which leave much to be desired. |
I could go on and on about the printer but I think pictures are much better than words in this case.
 |
| My very first test print from about a week ago. 200 microns (medium resolution). One of the things I like about this model is how it demonstrates why a cooling fan is necessary on small layers. This print isn't bad though considering I hadn't installed said cooling fan yet. |
 |
| Octopus at 200 microns. The dark spots are from a leaky nozzle. It's a relatively simple fix but I was too engrossed with testing the printer to care at the time. |
 |
| Finished printing a spool holder by Brandon B. This print showed me I still need to dial in my retraction settings. Bowden extruders can be tricky to calibrate, but I wasn't far off. |
 |
| http://www.thingiverse.com/thing:30887. This is the same model printed on three different printers, each at 200 microns. Left: my Clonedel's inaugural print. It had some issues. I don't wanna talk about it. Middle: printed on a Flashforge Creator. Came out beautifully. Right: printed by the Ulticrater. Clearly the quality is on par with the Creator (ignoring the leaky nozzle). |
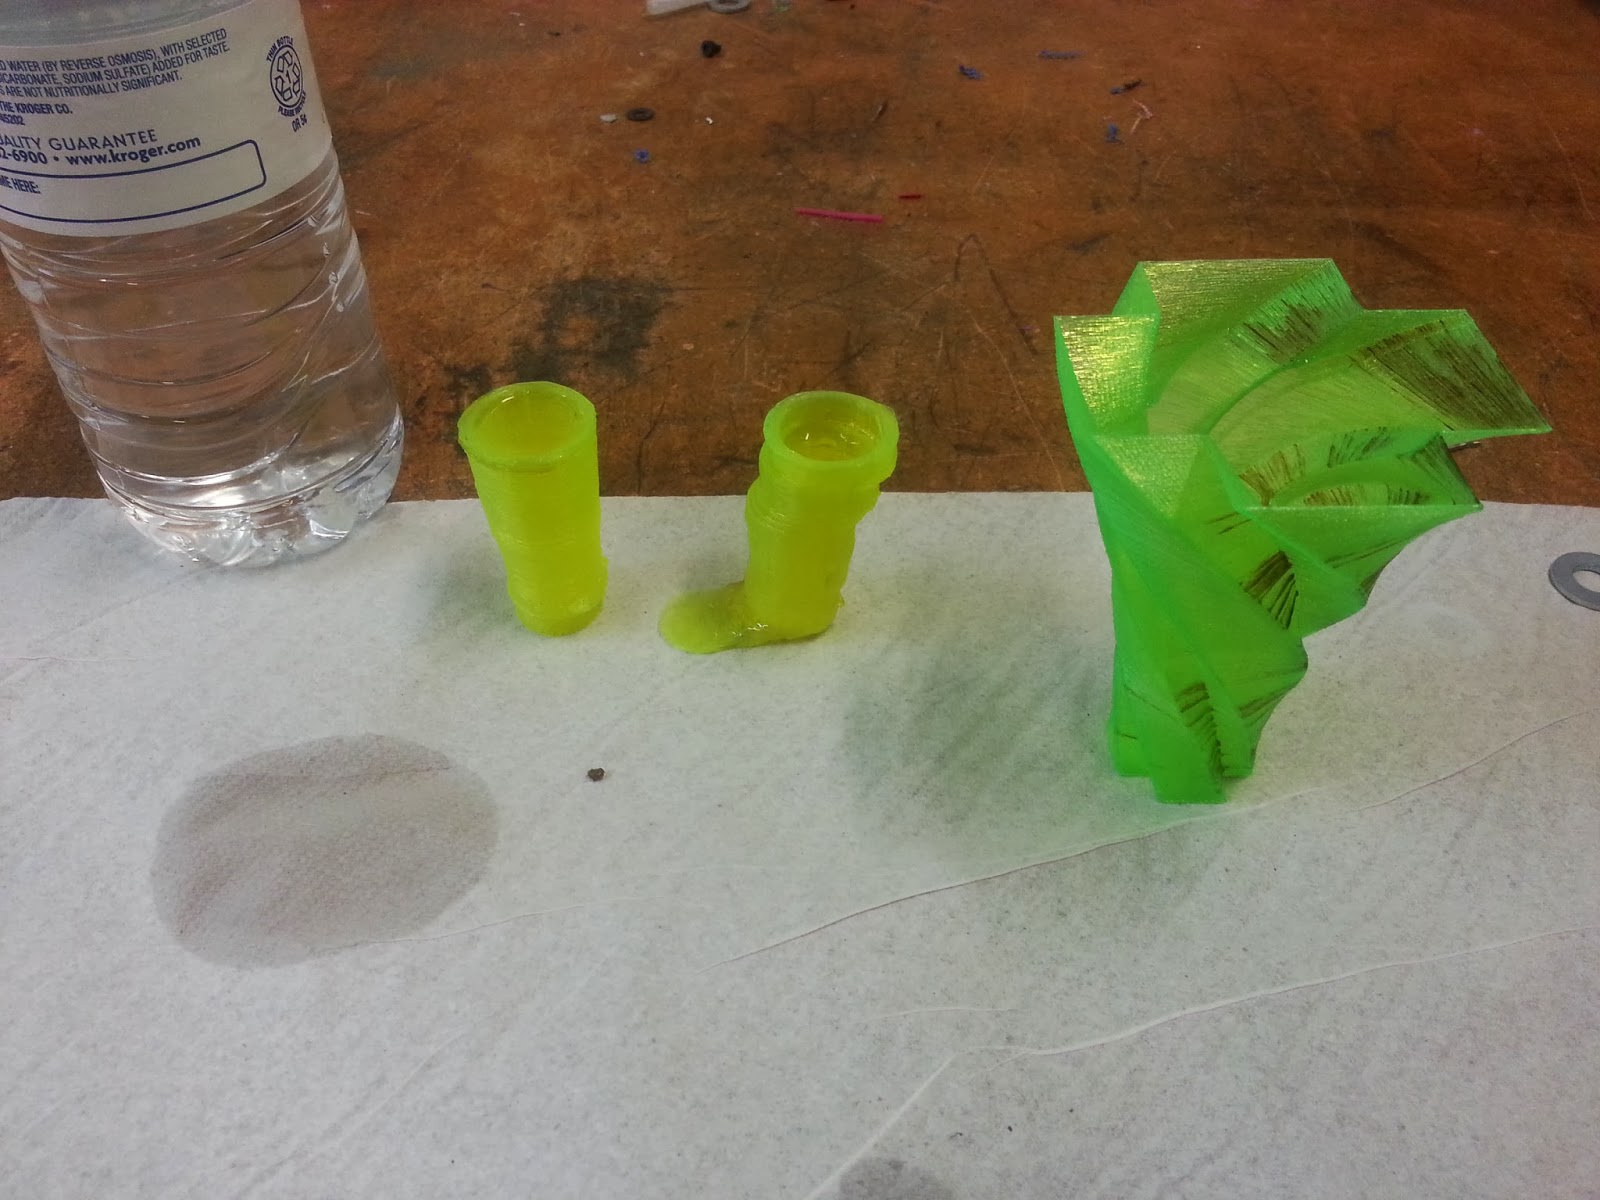 |
| Doing a watertightness test. Jeff 2 and I decided to test our printers by printing some vessels and watch for leaks. My print is on the right. It was a single shell thick and didn't even know the meaning of the word leak. |
I have a few videos of printing that were too big for Blogger to post. Follow the links to my Youtube channel where I've posted them:
Printing a comparison part
http://youtu.be/elPq56tUgEY
Fast printing test
http://youtu.be/5qBtARTGfjc
The features of the Ulticrater were either prescribed from the beginning or evolved from the design process. Since it was my design and I wasn't under a tight delivery schedule I was able to incorporate lots of awesome features.
- Machine Design
- Balances ease of assembly, performance, and cost.
- Built into a sturdy, compact frame (perfect for fitting in dorm rooms).
- Little dependency on the features of milk crates which vary from crate to crate.
- Requires no special setup/teardown procedure for transportation. I have literally unplugged the machine then carried it around by one of the crate's handles.
- Parts designed to be printed at low resolution with minimal support (for cost effectiveness).
- Fully reprapable.
- Extrusion
- J-Head hot end with active cooling, a proven design.
- Two piece extruder with auto-tensioning pinch wheel for reliability and quick filament changes.
- Side mounted spool holder means you never have to turn bot around or awkwardly reach around it to change filament. It also fits all popular spool sizes.
- Electronics
- Popular RAMPS 1.4 electronics.
- Single z-axis motor simplifies z movement and reduces motor count.
- Heated build platform with three point leveling system.
- Hall Effect endstops means the bot doesn't rely on a collision to determine when it has reached home.
- LCD interface with SD card reader for printing without connected computer.
- Motion
- Bowden extruder with H-Bot gantry results in low inertia (enabling high tool speeds and reduced vibration).
- Linear bearings for smooth gantry motion.
- A belt tensioning system that doesn't rely on zip ties.
- Machined timing pulleys and GT2 belts for increased precision (10 micron resolution in X-Y).
- Assembly
- Time to assemble bot is less than time to print parts (first time assemblers may take longer). This also gives it a Fibonacci property (ask me if you really want to know what that means).
- Requires only simple modifications of milk crate.
- All parts are designed for bolt together or press fit assembly.
For the next few weeks I'll be in the WOOF room during open workroom times (noon-5 on Fridays) to show off the Ulticrater to anybody who wants to see it in action.
Finally, I'd like to give special thanks to Brandon B. for cutting dozens of 1/4" rods and suggesting the name Ulticrater, Matthew S. for making me consider an H-bot gantry, and Jeff 2 for being a sounding board during the design revision process and encouraging me to set a final delivery deadline. Extra thanks to the WOOFers in the workroom who had to put up with my project consuming table space for the months of development.
Finally, I'd like to give special thanks to Brandon B. for cutting dozens of 1/4" rods and suggesting the name Ulticrater, Matthew S. for making me consider an H-bot gantry, and Jeff 2 for being a sounding board during the design revision process and encouraging me to set a final delivery deadline. Extra thanks to the WOOFers in the workroom who had to put up with my project consuming table space for the months of development.
Great site. I like this kind of Site. All information is good. If you like this kind of another site. you can visit this site. Thanks for admin who create this blog. I think it is great and informatics.to know more all in one printer comparison
ReplyDelete